Matcha Deco Roll Cake Recipe
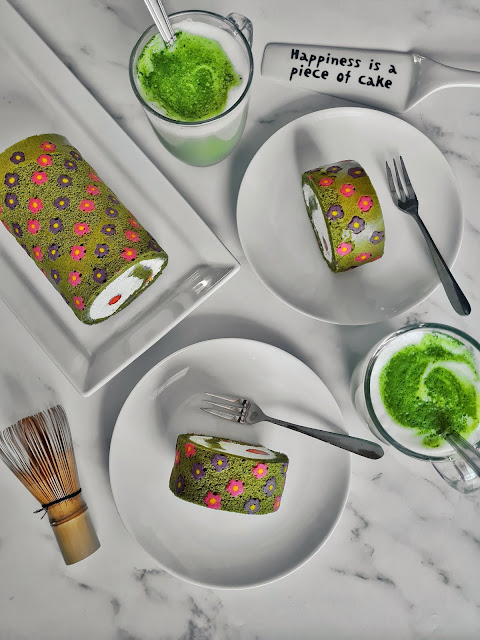
I've made several pretty deco roll cakes before, but never a matcha one. That's about to change.
Need a visual? Watch me make it on YouTube:
Ready? Let's go.
Ingredients for Deco Transfer:
20g unsalted butter, softened
30g caster sugar
1 egg white (save the egg yolk)
40g plain flour
Purple and pink gel food colouring
Ingredients for Swiss Roll:
4 eggs, separated, plus the leftover egg yolk
40g caster sugar
40g self-raising flour
10g cornflour
1 tbsp matcha
Pinch of salt
Ingredients for Filling:
300ml double cream, softly whipped
2 tbsp caster sugar
6–8 strawberries (depending on size)
Method:
1. Line a 26 x 36cm baking tray with non-stick greaseproof paper, and very lightly grease it. Slide a printout of the pattern you want to use underneath.
2. Make the deco transfer mix: beat the butter and sugar together, followed by the egg white and flour. Divide between three bowls and colour as you like.
3. Using a small round piping nozzle or a piping bag with a tiny hole cut into the corner, pipe on the pattern, using the printout underneath to trace over the baking paper. Pop in the freezer for about fifteen minutes, or until the pattern is solid.
4. Preheat the oven to 180°C, and make the swiss roll mixture: beat the egg whites with an electric whisk in a large bowl until they form stiff white peaks. Add in half of the sugar and the salt and keep beating until glossy.
5. Whisk the egg yolks in a separate bowl with the rest of the sugar until pale and fluffy, then sift and fold in the flours and matcha.
6. Take a few tablespoons of the meringue and incorporate gently into the egg yolk mixture, then very gently fold in the rest of the egg whites with a spatula or metal spoon until combined.
7. Pour into the tin on top of the pattern and spread evenly (you can remove the paper transfer if you like, but you don't have to). Drop the tin a few times on the counter to bang large air bubbles out, and bake for 10–15 minutes (up to 20 depending on your oven). Loosen the sides with a knife, then invert the whole thing onto a cooling rack and leave to cool completely.
8. Whip the cream and sugar together until it forms soft peaks. Place the cake pattern-side down on a fresh sheet of baking parchment, and trim one end at an angle so it's sloping downwards (this will help seal the cake smoothly when you roll it up).
9. Spread the cream evenly onto the cake leaving a few inches of space at the end and spreading a very thin layer onto the angled end to help stick everything together. Arrange the raspberries in a row on the end of the cake closest to you, and gently roll the cake up. Roll it up in the baking parchment tightly, twisting the ends and sticking a little tape on the edge to keep it together. Pop in the fridge for about four hours or overnight to let the cream set.
10. Slice, serve, and enjoy.


Comments
Post a Comment